Using a Web Deploy package to deploy to IIS on the dev box and to a third party host
November 08, 2011 0:11 Comments [1]Note: I’d like to thank Tom Dykstra for helping me put this together
Overview
In this tutorial you'll see how to use a web deployment package package to deploy an application. A deployment package is a .zip file that includes all of the content and metadata that's required to deploy an application.
Deployment packages are often used in enterprise environments. This is because a developer or a continuous integration server can create the package without needing to know things like passwords that are stored in Web.config files. Only the server administrator who actually installs the package needs to know those passwords, and that person can enter the details at installation time.
In a smaller organization that doesn't have separate people for these roles, there's less need for deployment packages. But you can also use deployment packages as a way to back up and restore the state of an application. After you use a deployment package to deploy, you can save the package,. Then if a subsequent deployment has a problem, you can quickly and easily restore the application state to the earlier state by reinstalling the earlier package. (This scenario is more complicated if database changes are involved, however.)
This tutorial shows how to use Visual Studio to create a package and IIS Manager to install it. For information about how to create and install packages using the command line, see ASP.NET Deployment Content Map on the MSDN web site.
To keep things relatively simple, this example assumes you have already deployed the application and its databases, and you only need to deploy a code update. You have made the code update, and you are ready to deploy it first to your test environment (IIS on your local computer) and then to your hosting provider. You have a Test build configuration that you use for the test environment and you use the Release build configuration for the production environment. In the example, the name of the Visual Studio project is ContosoUniversity, and instructions for its initial deployment can be found in a series of tutorials that will be published in December on the ASP.NET web site.
The hosting provider shown, Cytanium.com, is one of many that are available, and its use here does not constitute an endorsement or recommendation.
Note The following example uses separate packages for the test and production environments, but you can also create a single deployment package that can be used for both environments. This would require that you use Web Deploy parameters instead of Web.config transformations for Web.config file changes that depend on deployment destination. For information about how to use Web Deploy parameters, see How to: Use Parameters to Configure Deployment Settings When a Package is Installed.
Configuring the Deployment Package
In this section, you'll configure settings for the deployment package. Some of these settings are the same ones that you set also for one-click publish, others are only for deployment packages.
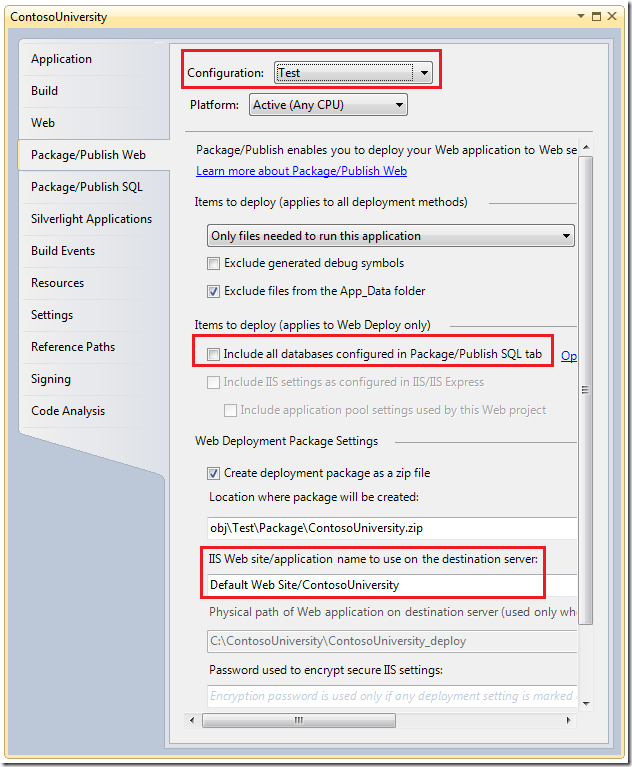
Open the Package/Publish Web tab of the Project Properties window and select the Test build configuration.
For this deployment you aren't making any database changes, so clear Include all databases configured in Package/Publish SQL tab. Make sure Exclude files from the App_Data folder is selected.
Review the settings in the section labeled Web Deployment Package Settings:
- By default, deployment packages are created as .zip files. You don't need to change this setting.
- By default, deployment packages are created in the project's obj\Test\Package folder. You don't need to change this setting.
- The default IIS web application name is the name of the project with "_deploy" appended to it. Remove that suffix. You want the application to be named just ContosoUniversity in IIS on your computer.
- For this tutorial you're not deploying IIS settings, so you don't need to enter a password for that.
The Package/Publish Web tab now looks like this:
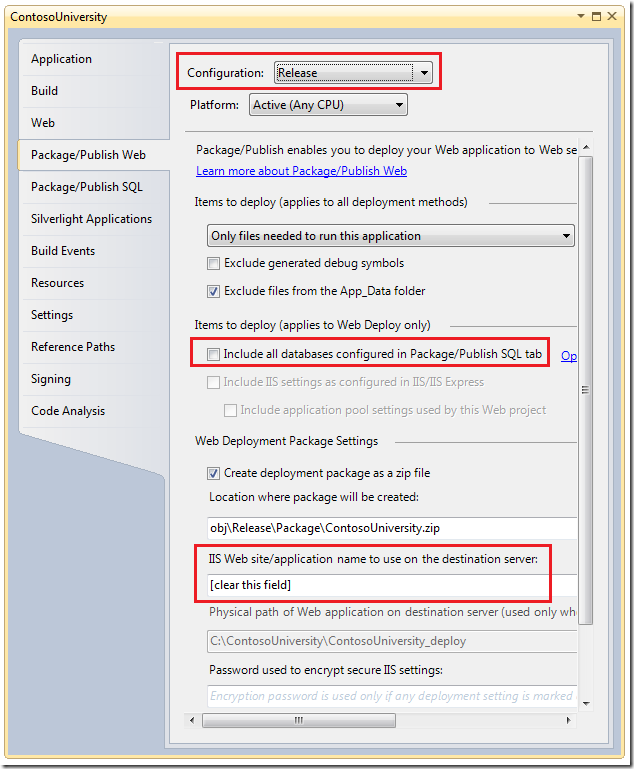
You also need to configure settings for deploying to the production environment. Select the Release build configuration to do that.
Change IIS Web site/application name to use on the destination server to a string that will serve as a reminder of what you need to do later when this value is displayed in the IIS Manager UI: "[clear this field]". The text box on this page won't stay cleared even if you clear it, so entering this note to yourself will remind you to clear this value later when you deploy. When you deploy to your hosting provider, you will connect to a site, not to a server, and in this case you want to deploy to the root of the site.
Creating a Deployment Package for the Test Environment
To create a deployment package, first make sure you've selected the right build configuration. In the Solution Configurations drop-down box, select Test.
In Solution Explorer, right-click the project that you want to build the package for and then select Build Deployment Package.
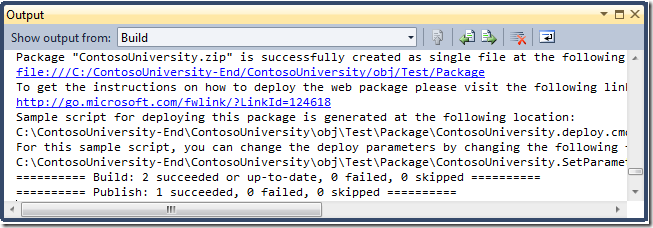
The Output window reports successful a build and publish (package creation) and tells you where the package was created.
Installing the Deployment Package in the Test Environment
The next step is to install the deployment package in IIS on your development computer.
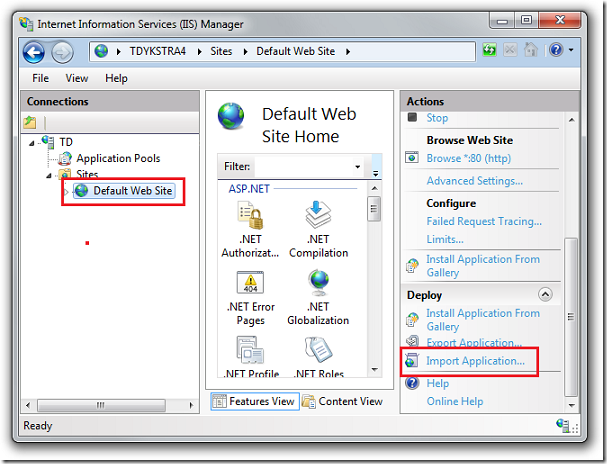
Run IIS Manager. In the Connections pane of the IIS Manager window, expand the local server node, expand the Sites node, and select Default Web Site. Then in the Actions pane, click Import Application. (If you don't see an Import Application link, the most likely reason is that you have not installed Web Deploy. You can use the Web Platform Installer to install both IIS and Web Deploy.)
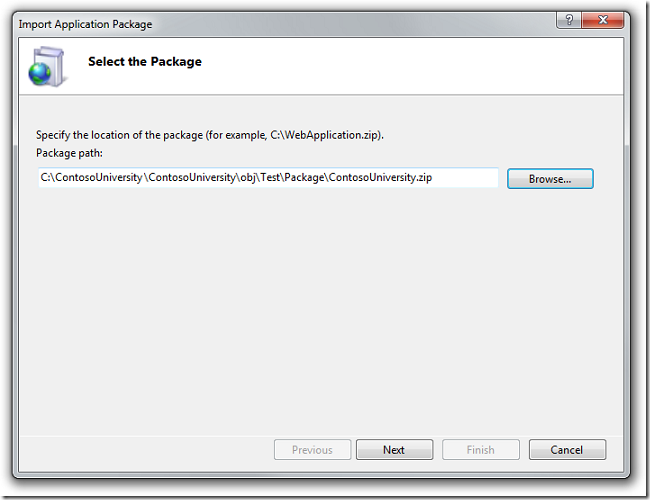
In the Select the Package wizard step, navigate to the location of the package you just created. By default, that's the obj\Test\Package folder in your ContosoUniversity project folder. (A package created with the Release build configuration would be in obj\Release\Package.)
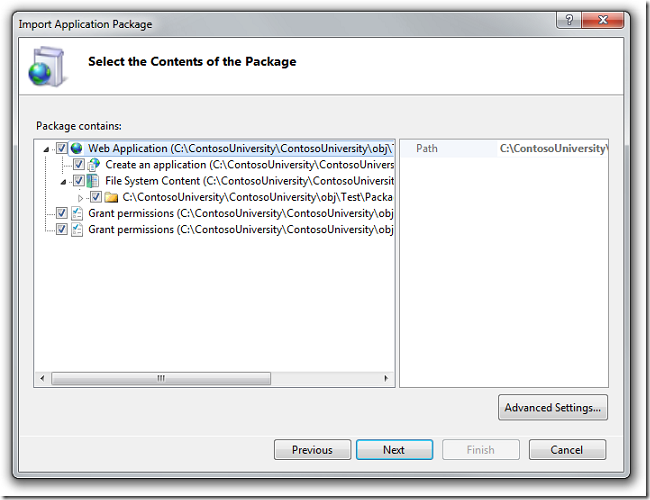
Click Next. The Select the Contents of the Package step is displayed.
Click Next.
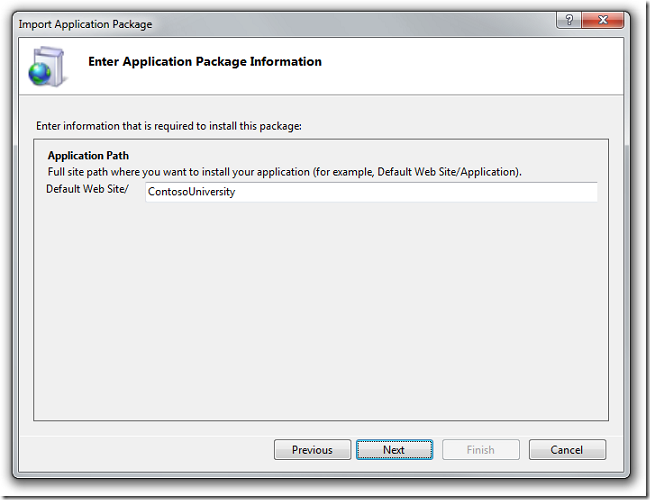
The step that allows you to enter parameter values is displayed. The Application Path value defaults to "ContosoUniversity", because that's what you entered on the Package/Publish Web tab of the Project Properties window.
Click Next.
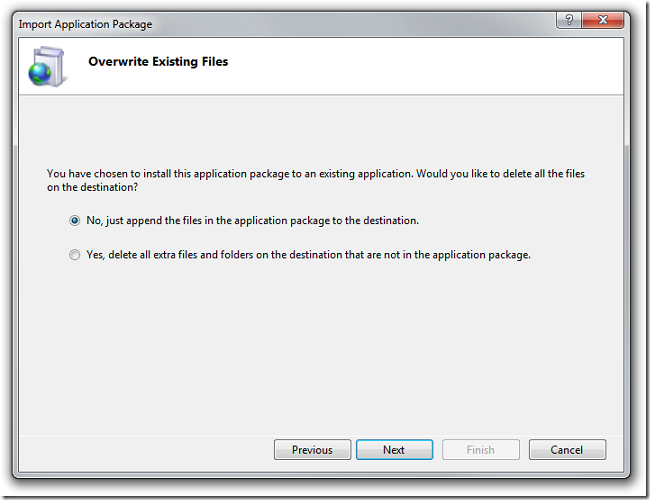
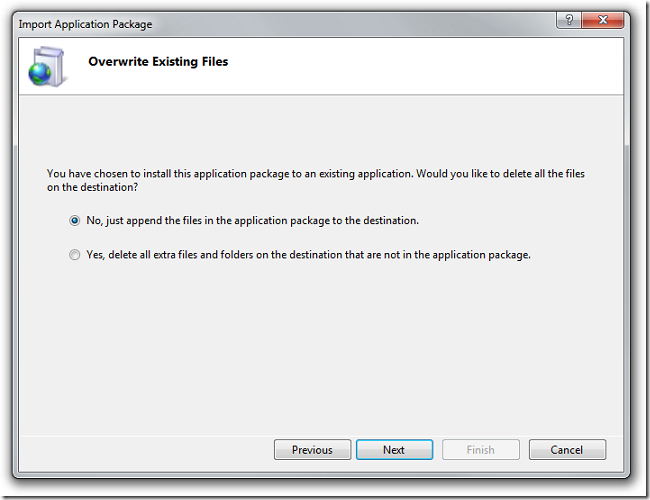
The wizard asks if you want to delete files at the destination that aren't in the source.
In this case you haven't deleted any files that you want to delete at the destination, so the default (no deletions) is okay. Click Next.
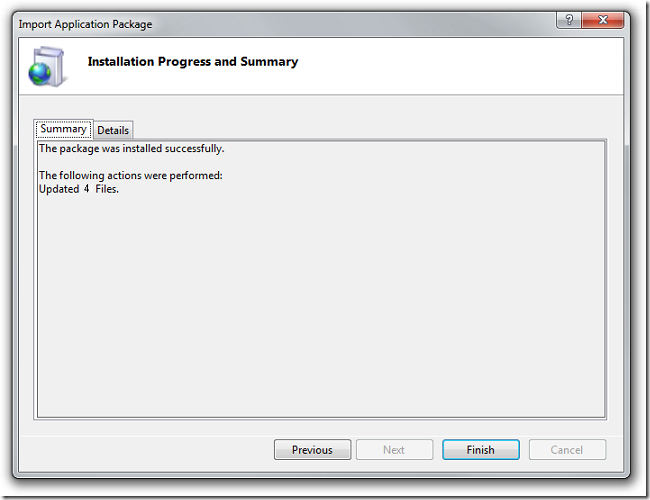
IIS Manager installs the package and reports its status.
Click Finish.
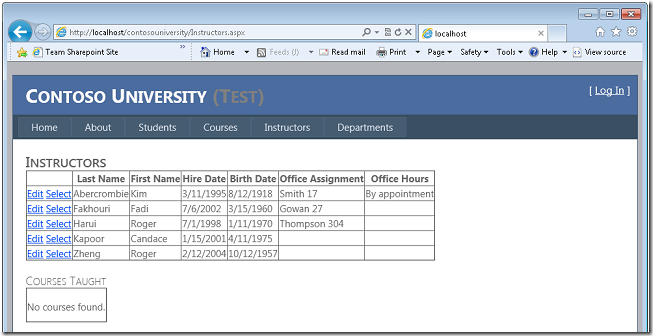
Open a browser and run the application in test by going to the URL http://localhost/ContosoUniversity.
Installing IIS Manager for Remote Administration
The process for deploying to production is similar except that you create the package using the Release build configuration, and you install it in IIS Manager using a remote connection to the hosting provider. But first you have to install the IIS Manager feature that facilitates remote connections.
Click the following link to use the Web Platform Installer for this task:
Connecting to Your Site at the Hosting Provider
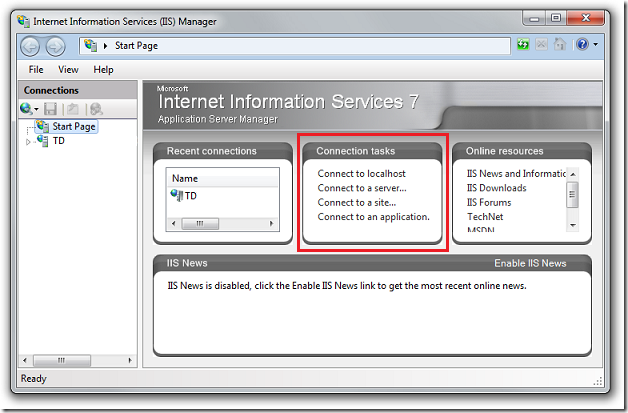
After you install the IIS Manager for Remote Administration, run IIS Manager. You see a new Start Page in IIS Manager that has several Connect to ... links in a Connection tasks box. (These options are also available from the File menu.)
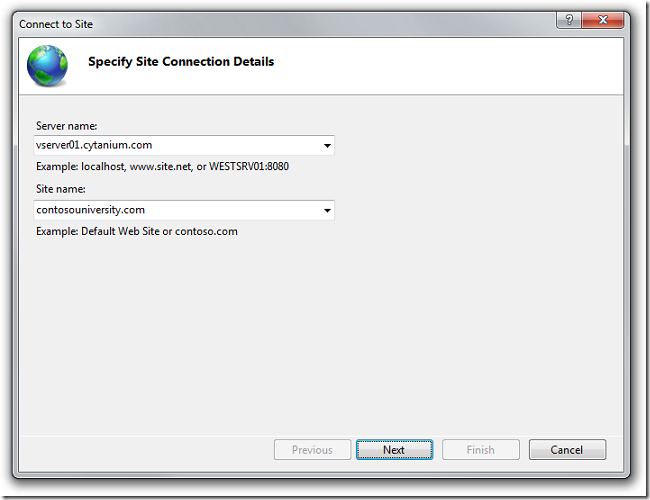
In IIS Manager, click Connect to a site. In the Specify Site Connection Details step, enter the Server name and Site name values that are assigned to you by your provider, and then click Next. For a hosting account at Cytanium.com, you get the server name from Service URL in the Visual Studio 2010 section of the welcome email. The site name is indicated by "Site/application" in the same section of the email.
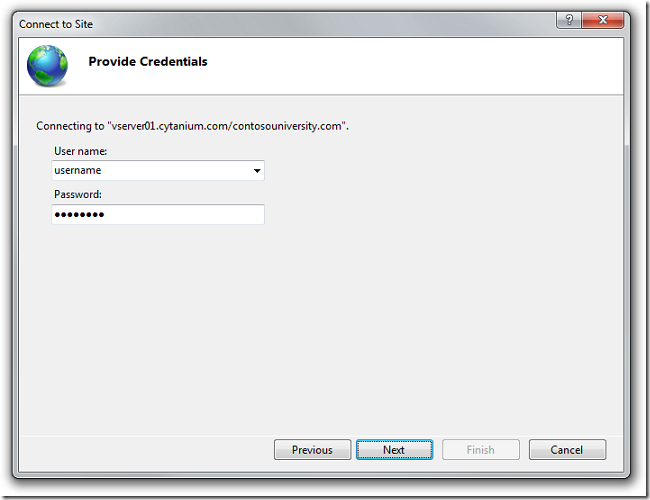
In the Provide Credentials step, enter the user name and password assigned by the provider, and then click Next:
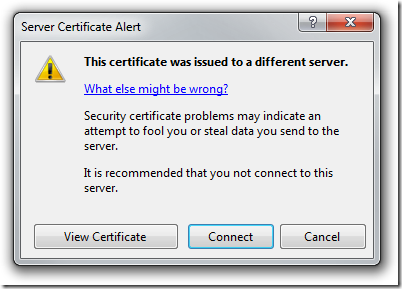
You might see a Server Certificate Alert dialog box. If you're sure that you've entered the correct server and site name, click Connect.
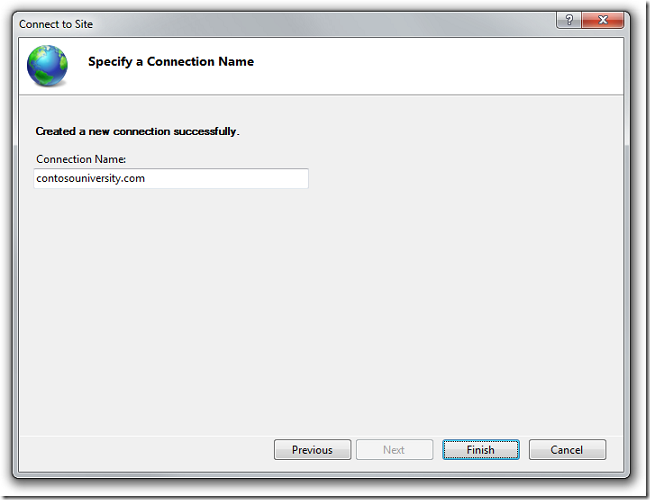
In the Specify a Connection Name step, click Finish.
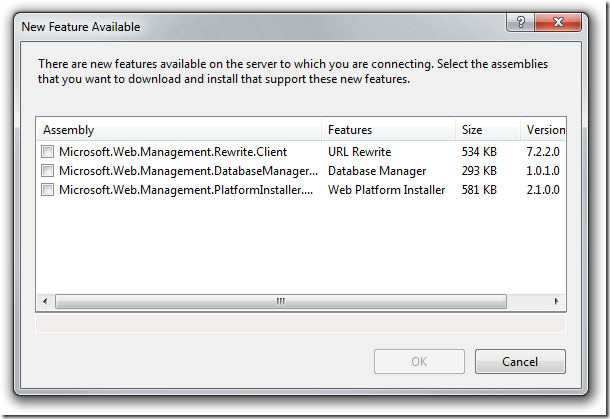
After IIS Manager connects to the provider's server, a New Feature Available dialog box might appear that lists administration features available for download. Click Cancel — you've already installed everything you need for this deployment.
After the New Feature Available box closes, the IIS Manager window appears. There's now a node in the Connections pane for the site at the hosting provider.
Creating a Package for the Production Site
The next step is to create a deployment package for the production environment. In the Visual Studio Solution Configurations drop-down box, select the Release build configuration.
In Solution Explorer, right-click the ContosoUniversity project and then select Build Deployment Package.
The Output window reports a successful build and publish (package creation), and it tells you that the package is created in the obj\Release\Package folder in your project folder.
Installing the Package in the Production Environment
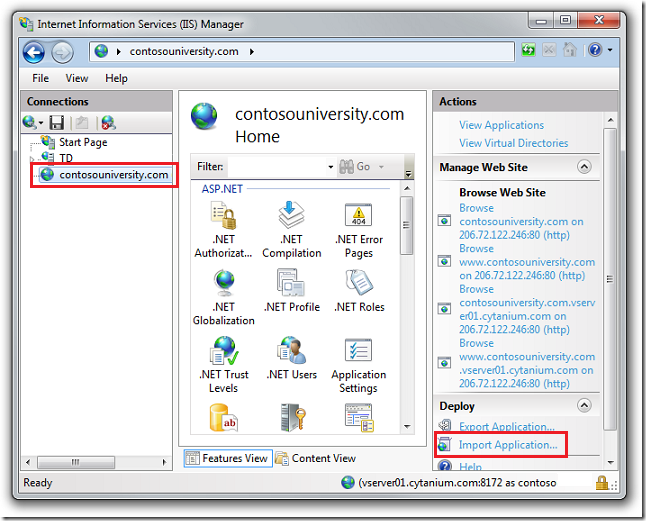
Now you can install the package in the production environment. In the IIS Manager Connections pane, select the new connection you added earlier. Then click Import Application, which will walk you through the same process you followed earlier when you deployed to the test environment.
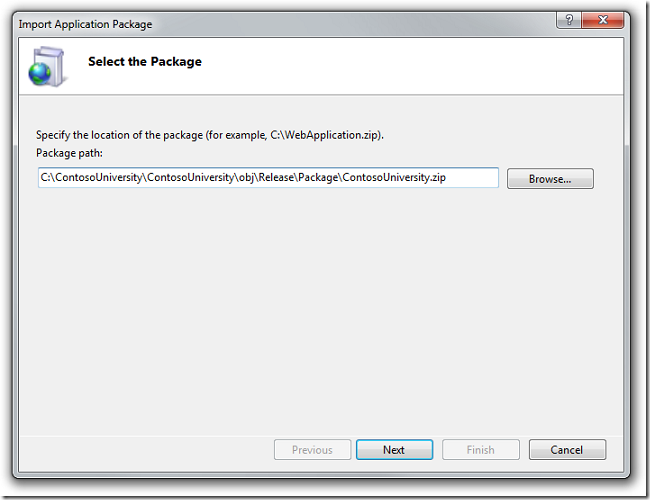
In the Select the Package step, select the package that you just created:
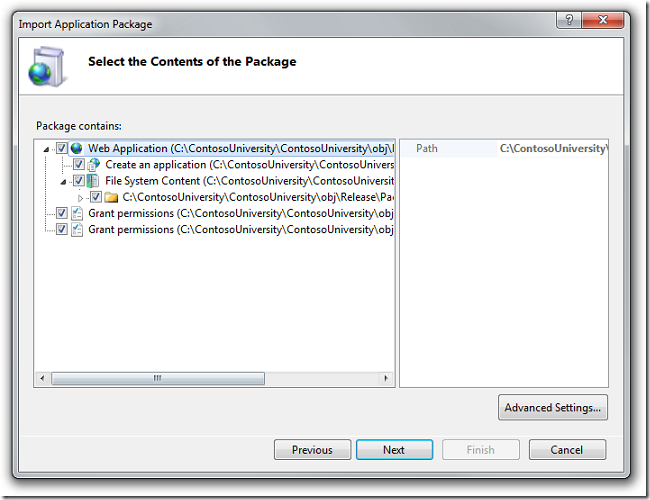
In the Select the Contents of the Package step, leave all the check boxes selected and click Next:
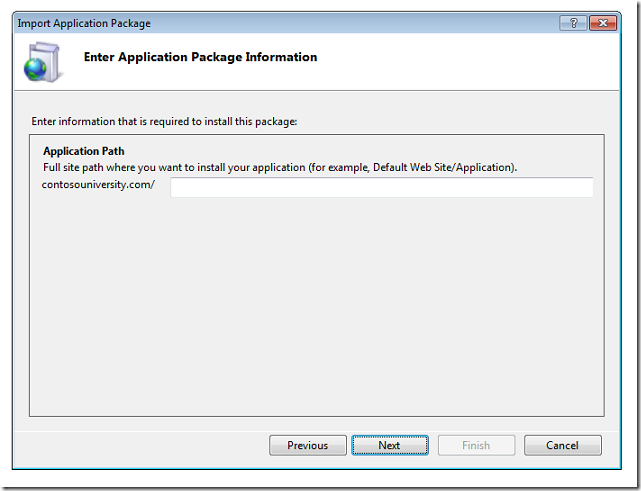
In the Enter Application Package Information step, clear the Application Path and click Next:
The wizard asks if you want to delete files at the destination that aren't in the source.
You don't need to have anything deleted, so just click Next.
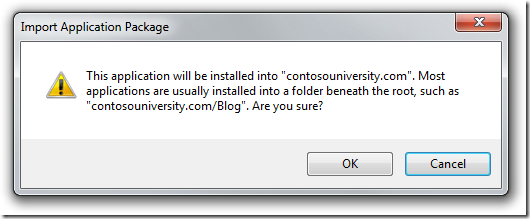
When you get the warning about installing to the root folder, click OK:
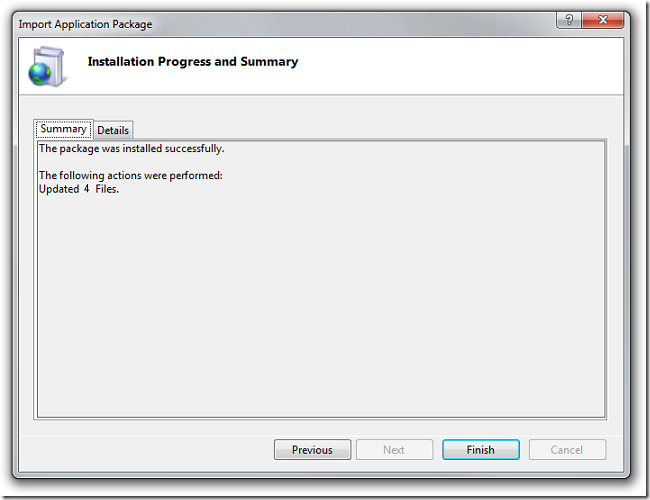
Package installation begins. When it's done, the Installation Progress and Summary dialog box is shown:
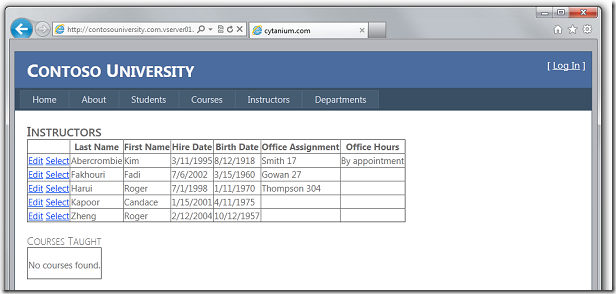
Click Finish. Your application has been deployed to the hosting provider's server, and you can test by browsing to your public site's URL.
You've now seen how to deploy an application update by manually creating and installing a deployment package. For information about how to create and install packages from the command line in order to be able to integrate them into a continuous integration process, see the ASP.NET Deployment Content Map on the MSDN web site.
Sayed Ibrahim Hashimi – @SayedIHashimi
ddd


Comments are closed.